IR Remote Controlled RGB LED
HARDWARE REQUIRED:
- PICUNO Microcontroller board
- 1 × HW-490 IR Receiver Module
- 1 × IR Remote Display
- 1 × RGB LED Module
- Jumper wires
- USB cable
DESCRIPTION:
This project creates a versatile mood light that you can control wirelessly with a standard IR remote. The program decodes signals from the remote to set the RGB LED to specific colours (Red, Green, Blue, Yellow, etc.). It also includes special modes, like a flashing colour sequence and a smooth colour-fading effect, which can be activated by pressing different buttons on the remote. This demonstrates a practical application of IR control for creating dynamic lighting systems.
LIBRARIES REQUIRED:
For C / Arduino IDE:
IRremote by shirriff, z3t0, ArminJo: The driver library for the IR receiver Module.
For Micropython / Thonny IDE:
ir_rx.py: The custom library file for the IR receiver module, saved to the PICUNO board.
LIBRARIES REQUIRED:
For C / Arduino IDE:
IRremote by shirriff, z3t0, ArminJo: The driver library for the IR receiver Module.
For Micropython / Thonny IDE:
ir_rx.py: The custom library file for the IR receiver module, saved to the PICUNO board.
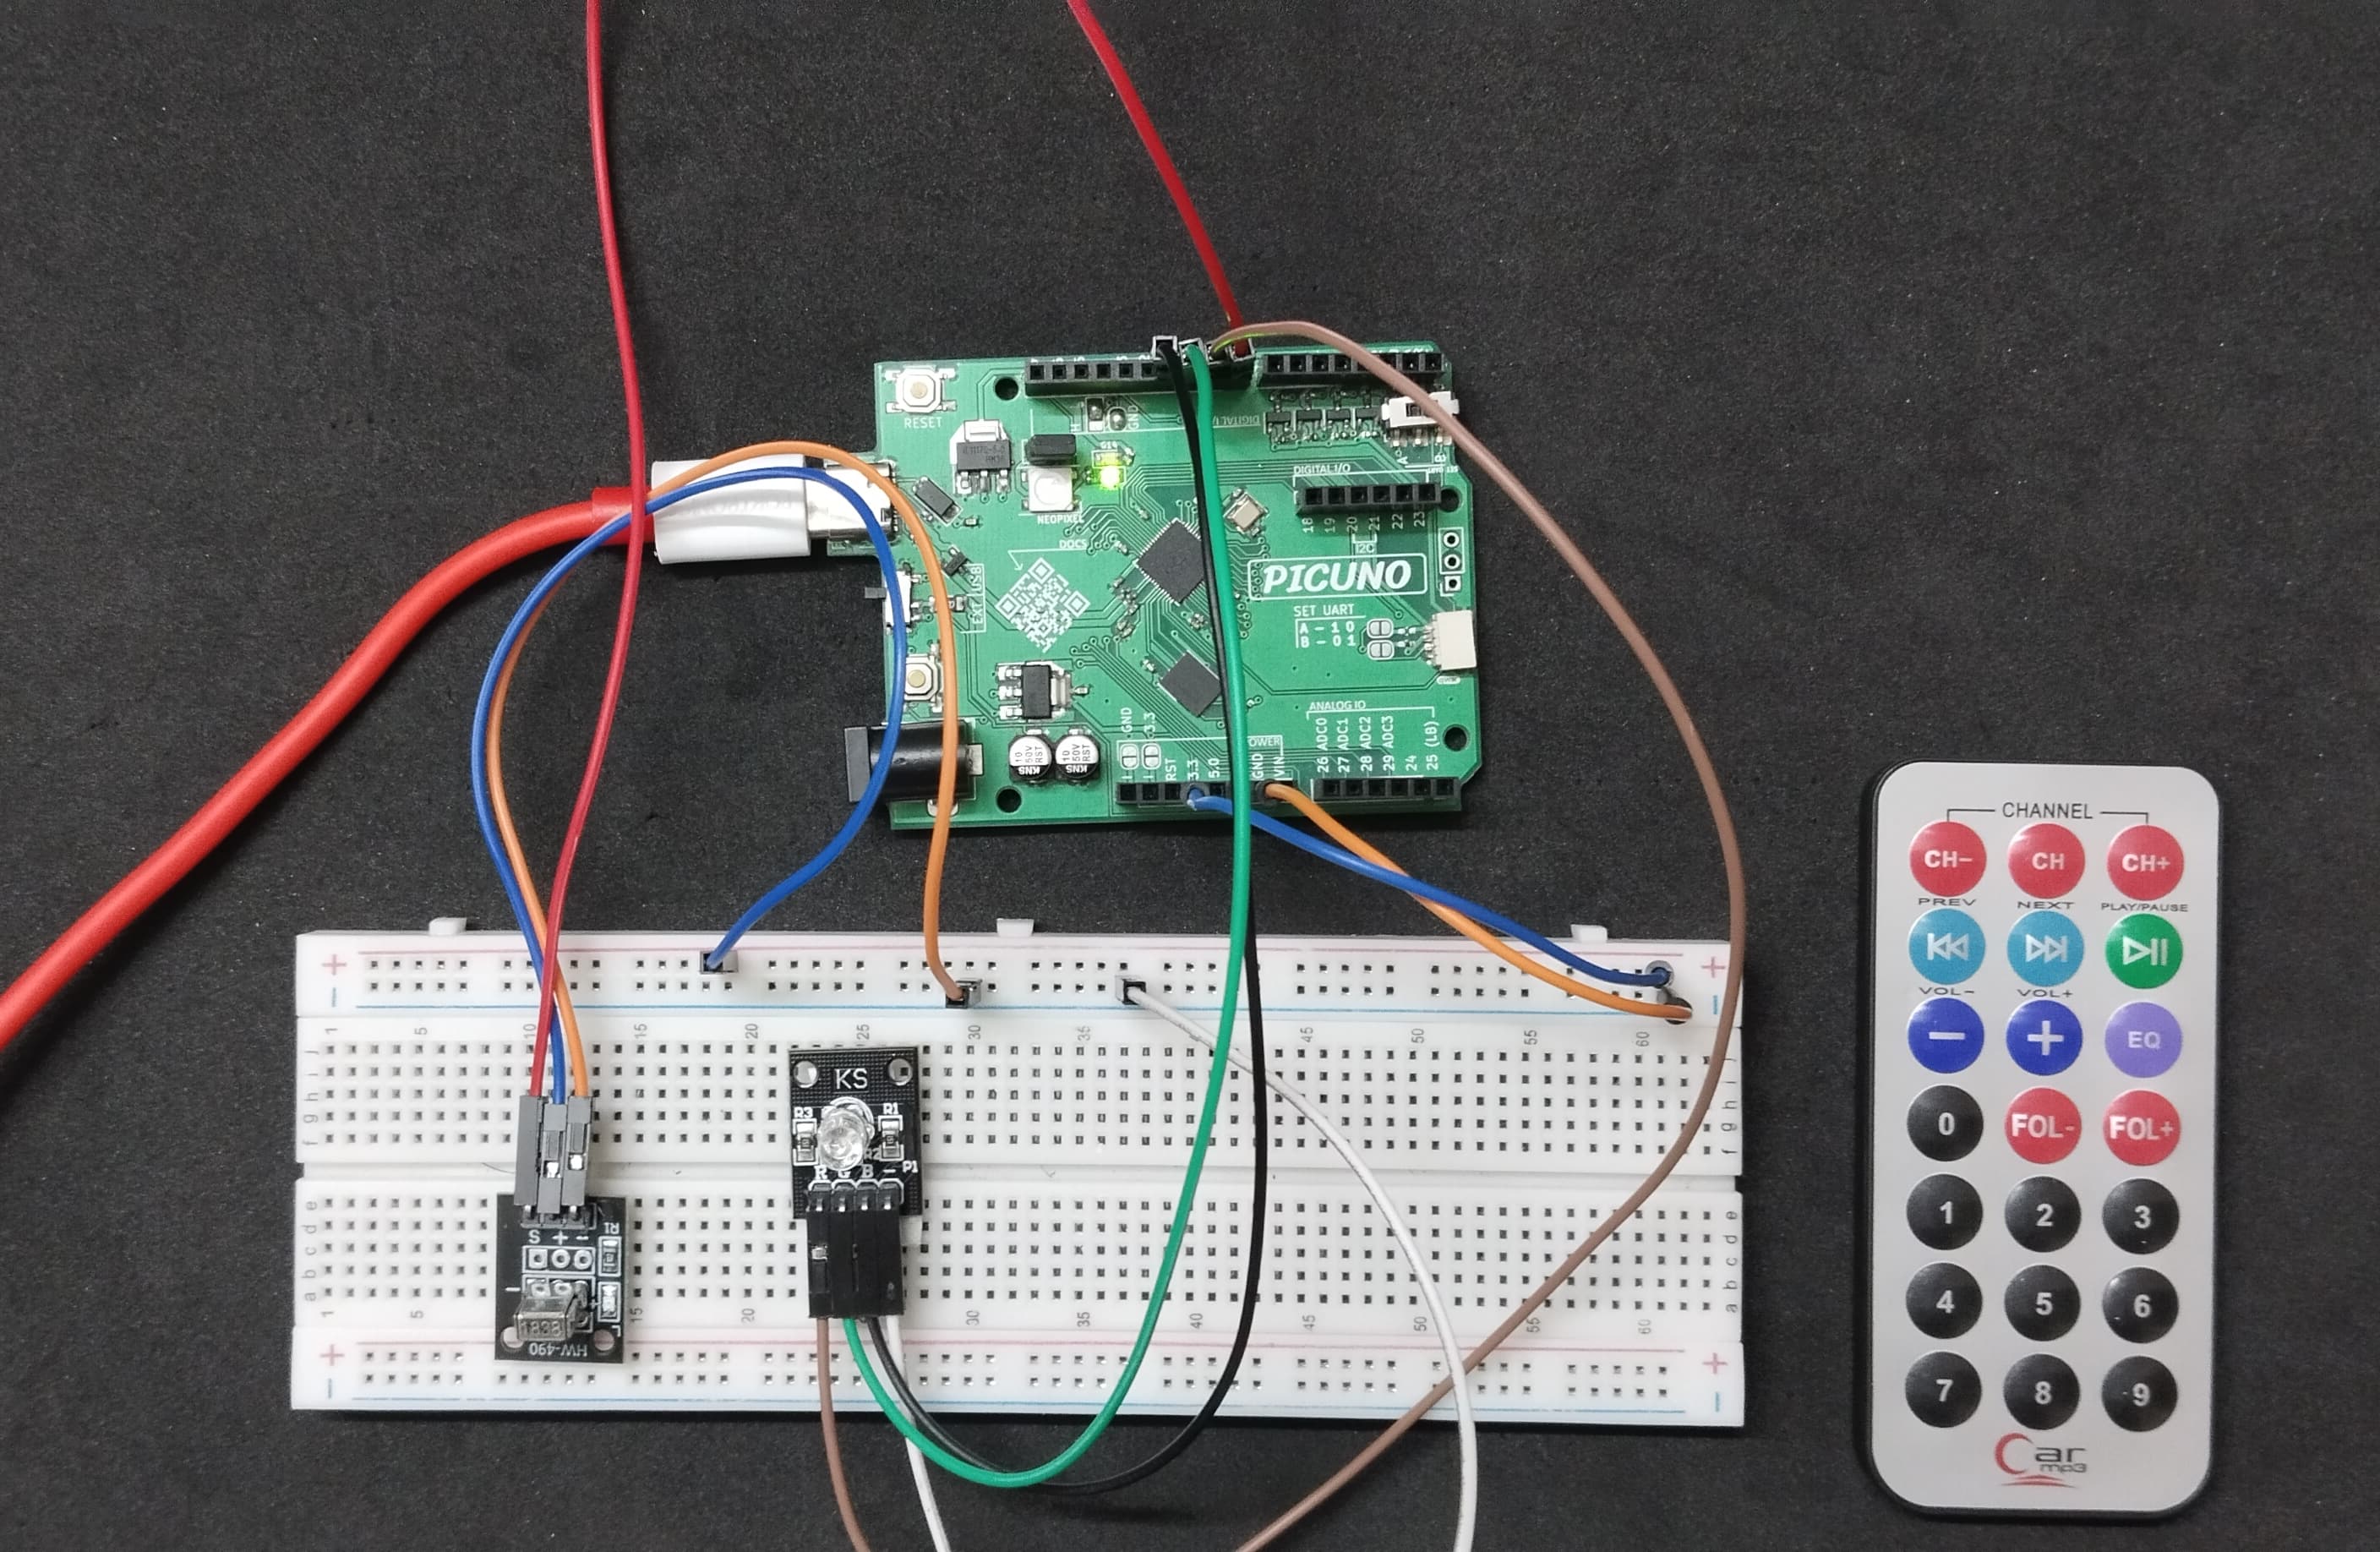
CIRCUIT DIAGRAM:
- Connect the Red LED (R) pin to GPIO 9.
- Connect the Green LED (G) pin to GPIO 10.
- Connect the Red LED (B) pin to GPIO 11.
- Connect the Ground (-) pin to GND on board.
- Connect the GND (-) pin to GND pin.
- Connect the VCC (+) pin to 5V.
- Connect the Signal (S) pin to GPIO 8.
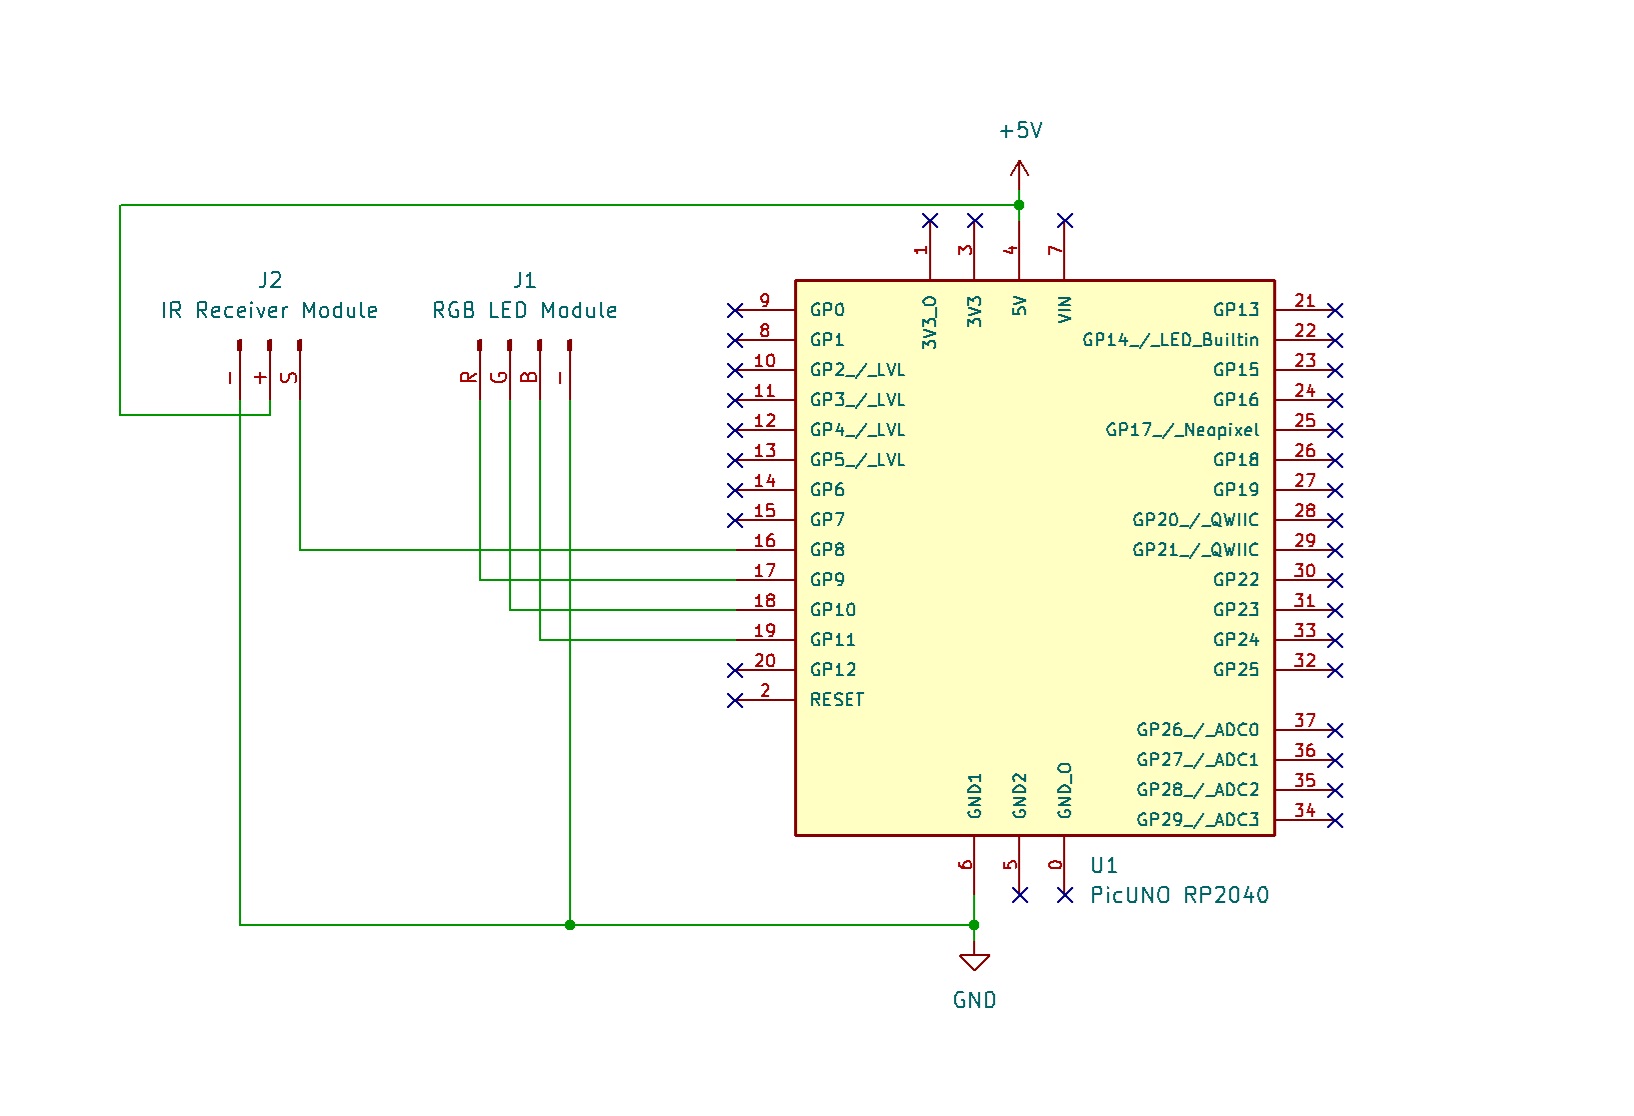
SCHEMATIC:
RGB LED Module:
Red LED (R) → GPIO 9
Green LED (G) → GPIO 10
Blue LED (B) → GPIO 11
GND/ (-) → GND
IR Receiver Module:
VCC / (+) → 5V
GND / (-) → GND
Signal (S) → GPIO 8
CODE -- C:
#include <IRremote.hpp>
const int IR_PIN = 8;
const int RED_PIN = 9;
const int GREEN_PIN = 10;
const int BLUE_PIN = 11;
int mode = 0;
void setup() {
Serial.begin(9600);
IrReceiver.begin(IR_PIN, ENABLE_LED_FEEDBACK);
pinMode(RED_PIN, OUTPUT);
pinMode(GREEN_PIN, OUTPUT);
pinMode(BLUE_PIN, OUTPUT);
setColor(0, 0, 0); // Initially OFF
}
void loop() {
if (IrReceiver.decode()) {
unsigned long code = IrReceiver.decodedIRData.decodedRawData;
if (code != 0 && !(IrReceiver.decodedIRData.flags & IRDATA_FLAGS_IS_REPEAT)) {
Serial.print("Code: ");
Serial.println(code, HEX);
}
if (code == 0xF30CFF00) { setColor(255, 0, 0); } // Red
else if (code == 0xE718FF00) { setColor(0, 255, 0); } // Green
else if (code == 0xA15EFF00) { setColor(0, 0, 255); } // Blue
else if (code == 0xF708FF00) { setColor(255, 255, 0); } // Yellow
else if (code == 0xE31CFF00) { setColor(0, 255, 255); } // Cyan
else if (code == 0xA55AFF00) { setColor(255, 0, 255); } // Magenta
else if (code == 0xBD42FF00) { mode = 1; } // Flash mode
else if (code == 0xAD52FF00) { mode = 2; } // Fade mode
else if (code == 0xB54AFF00) { mode = 0; setColor(0, 0, 0); } // OFF
IrReceiver.resume();
}
if (mode == 1) {
flashEffect();
} else if (mode == 2) {
fadeEffect();
}
}
// --- Helper Functions ---
void setColor(int r, int g, int b) {
analogWrite(RED_PIN, r);
analogWrite(GREEN_PIN, g);
analogWrite(BLUE_PIN, b);
}
void flashEffect() {
setColor(255, 0, 0);
delay(200);
setColor(0, 255, 0);
delay(200);
setColor(0, 0, 255);
delay(200);
}
void fadeEffect() {
for (int i = 0; i < 255; i++) {
setColor(i, 0, 255 - i); delay(5);
}
for (int i = 0; i < 255; i++) {
setColor(255 - i, i, 0); delay(5);
}
}
IrReceiver.decode() - The main function from the IRremote library that checks if a new signal has been received from the remote.
if/else if chain - This structure acts as the command centre. It takes the code received from the remote and compares it to a list of known codes. If a match is found, it runs the corresponding action.
mode variable - This is a simple state machine. It remembers which animation mode (0 for static, 1 for flash, 2 for fade) is currently active, and the loop() function checks this variable to decide whether to run an animation.
setColor() function - A helper function that makes it easy to set a colour. It uses analogWrite() to control the brightness of the red, green, and blue channels, allowing you to mix any colour.
flashEffect() / fadeEffect() - These functions contain the logic for the animations. flashEffect() uses delay() to switch between colours rapidly, while fadeEffect() uses a for loop to smoothly transition the brightness between different colours.
CODE -- PYTHON:
from machine import Pin, PWM
from time import sleep_ms
from ir_rx import IR_RX
IR_PIN = 8
RED_PIN = 9
GREEN_PIN = 10
BLUE_PIN = 11
red_led = PWM(Pin(RED_PIN))
green_led = PWM(Pin(GREEN_PIN))
blue_led = PWM(Pin(BLUE_PIN))
red_led.freq(1000); green_led.freq(1000); blue_led.freq(1000)
mode = 0
def ir_callback(data, addr, ctrl):
global mode
if data > 0:
hex_code = hex(data)
print(f"Code: {hex_code}")
if hex_code == '0x19': mode = 0; set_color(255, 0, 0) # Red
elif hex_code == '0x31': mode = 0; set_color(0, 255, 0) # Green
elif hex_code == '0xbd': mode = 0; set_color(0, 0, 255) # Blue
elif hex_code == '0x11': mode = 0; set_color(255, 255, 0) # Yellow
elif hex_code == '0x39': mode = 0; set_color(0, 255, 255) # Cyan
elif hex_code == '0xb5': mode = 0; set_color(255, 0, 255) # Magenta
elif hex_code == '0x85': mode = 1 # Flash mode
elif hex_code == '0xa5': mode = 2 # Fade mode
elif hex_code == '0x95': mode = 0; set_color(0, 0, 0) # OFF
def set_color(r, g, b):
red_led.duty_u16(int(r * 65535 / 255))
green_led.duty_u16(int(g * 65535 / 255))
blue_led.duty_u16(int(b * 65535 / 255))
def flash_effect():
set_color(255, 0, 0); sleep_ms(200)
set_color(0, 255, 0); sleep_ms(200)
set_color(0, 0, 255); sleep_ms(200)
def fade_effect():
for i in range(255):
set_color(i, 0, 255 - i); sleep_ms(5)
for i in range(255):
set_color(255 - i, i, 0); sleep_ms(5)
receiver = IR_RX(Pin(IR_PIN, Pin.IN), ir_callback)
set_color(0, 0, 0)
print("IR RGB Controller Ready.")
while True:
if mode == 1:
flash_effect()
elif mode == 2:
fade_effect()
else:
# If in static mode, sleep to prevent the loop from running too fast
sleep_ms(50)
ir_callback() function - This is an interrupt-driven function. The IR_RX library runs it automatically in the background whenever a new IR code is received. It contains the if/elif logic to check the code and set the correct mode.
mode variable - This global variable acts as a "state machine." It remembers which animation is active (0 for a static colour, 1 for flash, 2 for fade). The main while loop checks this variable to decide what to do.
set_color() function - A helper function that makes it easy to set a colour. It takes simple 0-255 brightness values and converts them into the 0-65535 range required by the Pico's PWM (Pulse Width Modulation) system.
PWM Objects - The PWM objects are used to control the brightness of each of the red, green, and blue channels of the LED, which is what allows you to mix any colour.
flash_effect() / fade_effect() - These functions contain the logic for the animations. flash_effect() uses sleep_ms() to rapidly switch between colours, while fade_effect() uses a for loop to smoothly transition the brightness from one colour to another.