Push-Button Relay Control
HARDWARE REQUIRED:
- PICUNO Microcontroller board
- 1 × 5V Relay Module
- 1 × Push Button
- 1 × LED
- 1 × 220Ω resistor (Current-limiting resistor)
- 9V Battery with a snap connector (to power the board via the DC Jack)
- Jumper wires
- USB cable
DESCRIPTION:
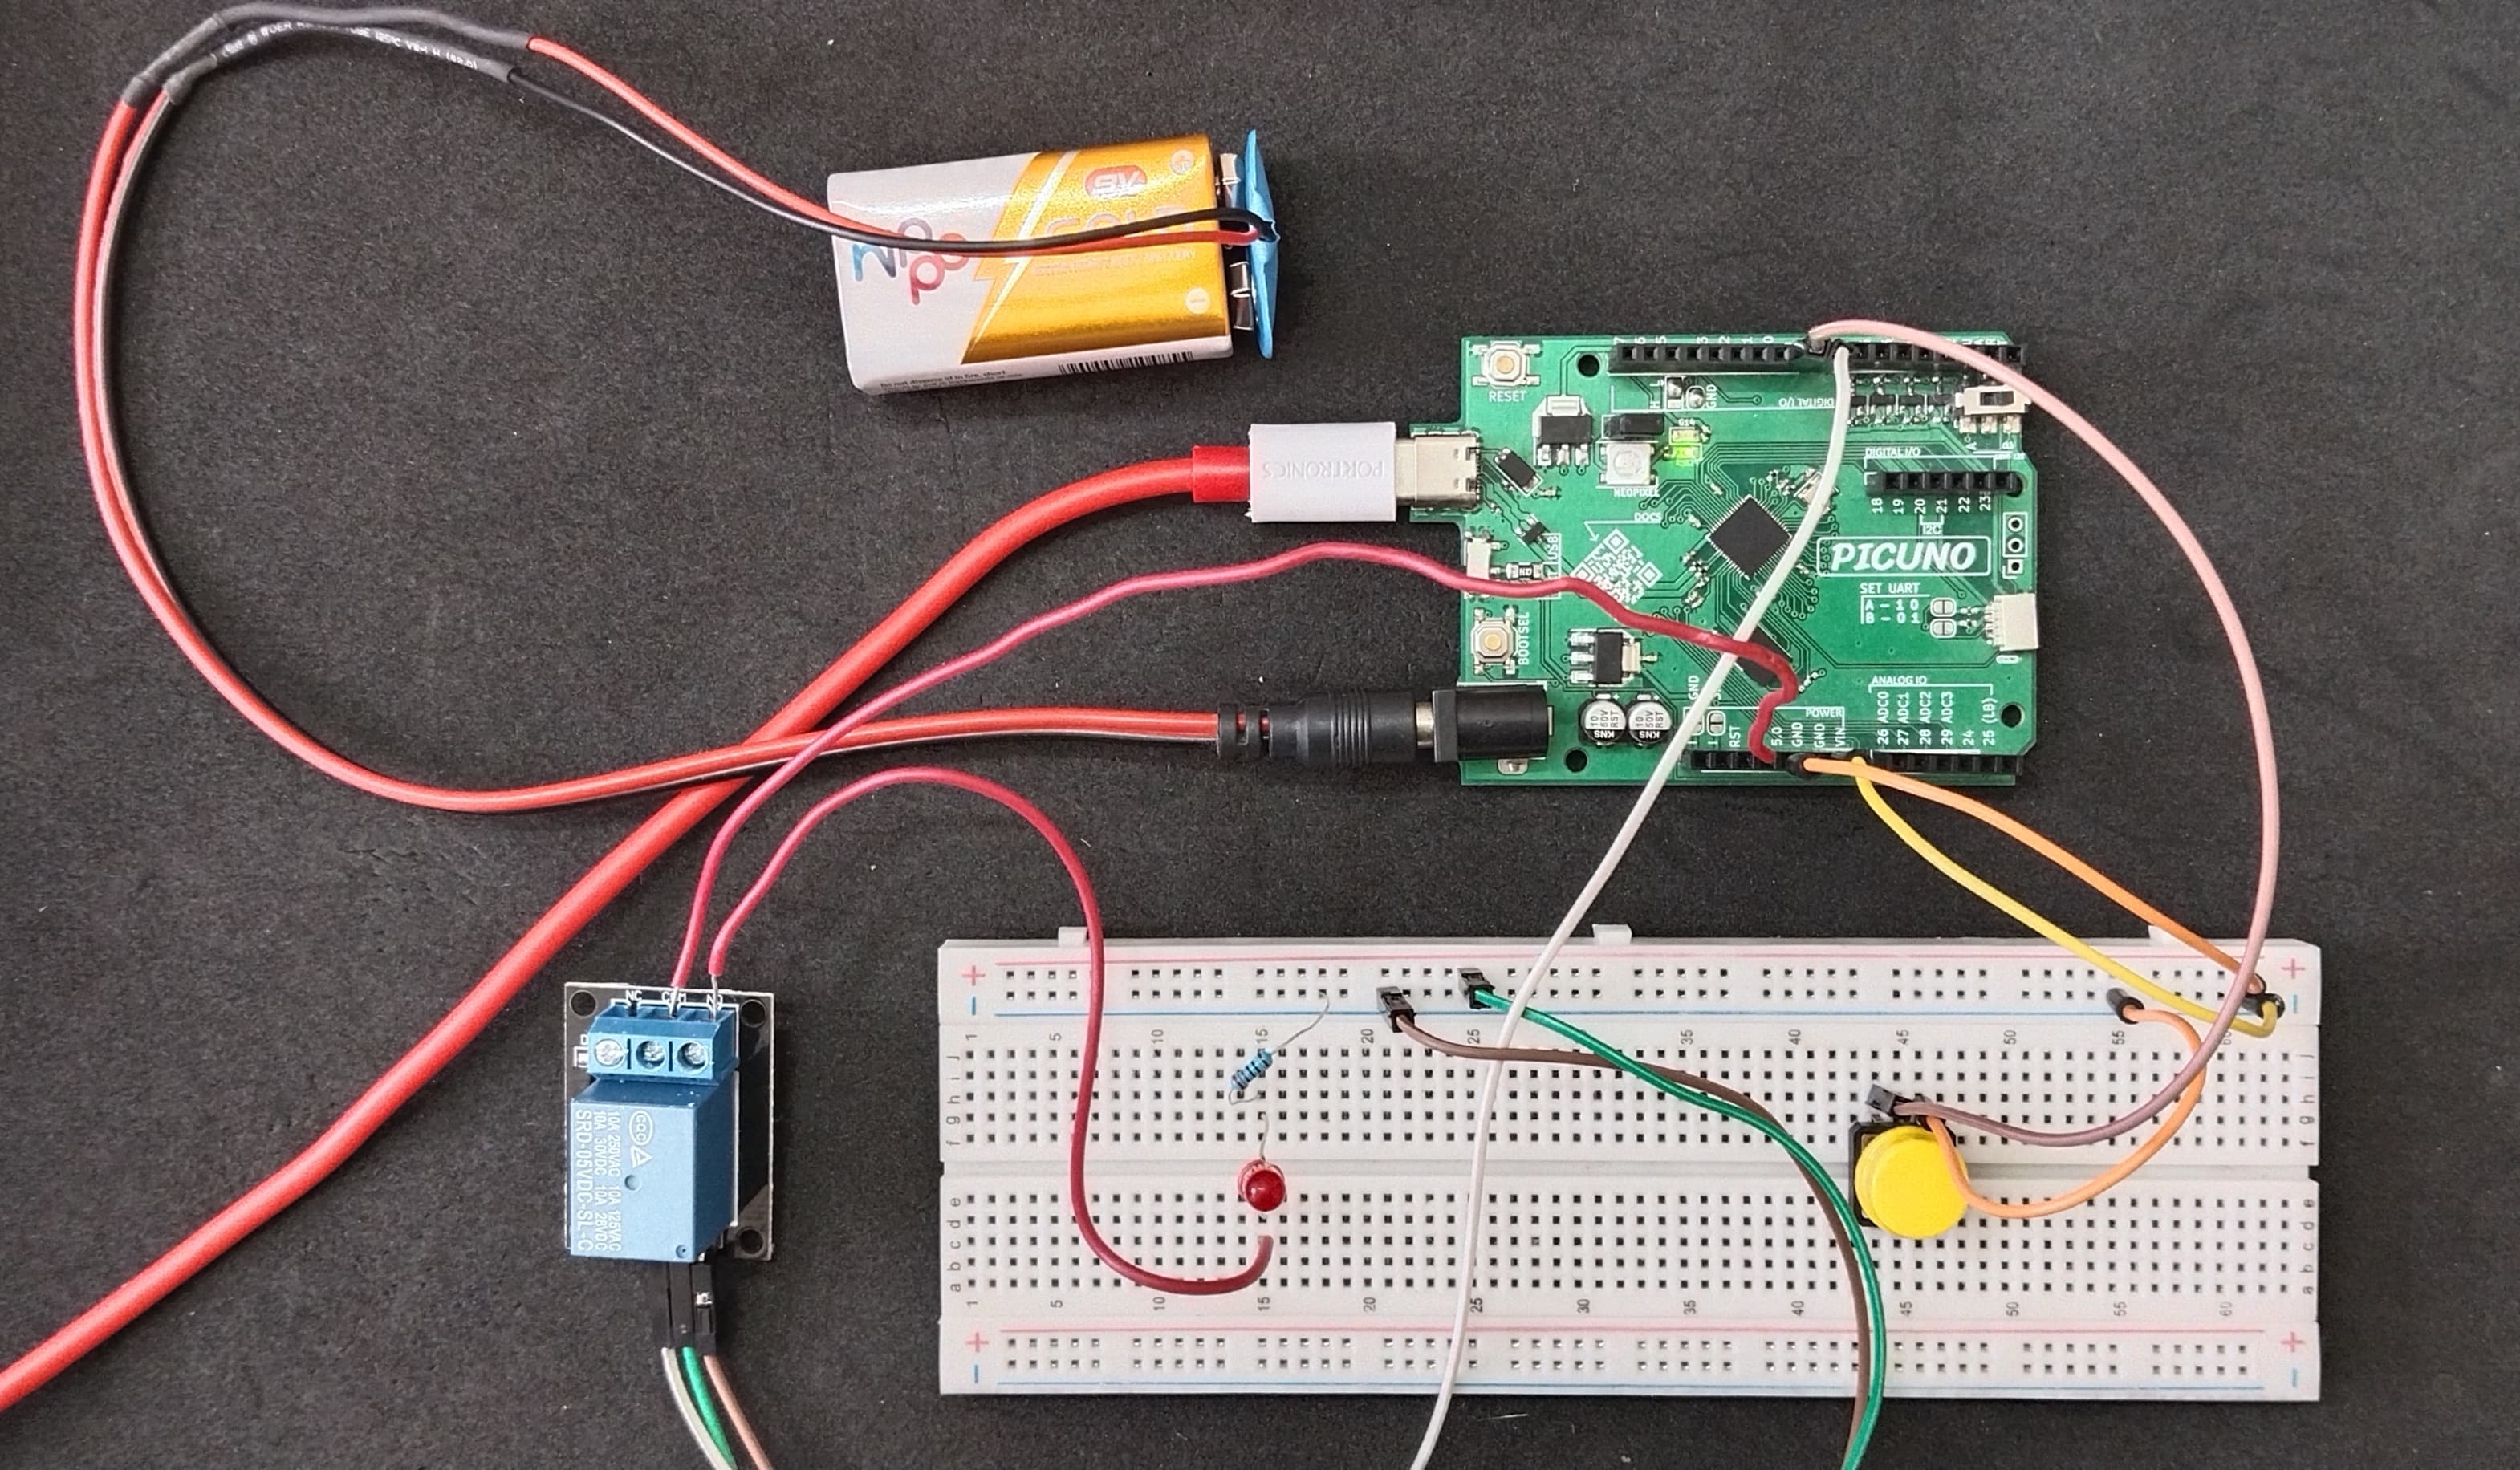
This project demonstrates the fundamental principle of using a relay to safely control a separate electrical circuit with a low-power microcontroller. A push button connected to the PICUNO acts as a toggle switch. When pressed, it sends a signal to the relay module, causing an internal electromagnet to close a physical switch. This completes an independent circuit, powered by a 9V battery, which turns on an LED. Pressing the button again opens the relay and turns the LED off. This electrical isolation is a key concept for any project that involves controlling high-power devices like fans or household lights.
CIRCUIT DIAGRAM:
- Connect the Relay Module's GND pin to a GND pin on PICUNO.
- Connect the Relay Module's VCC pin to the 5V pin on PICUNO.
- Connect the Relay Module's IN (Signal) pin to GPIO 8.
- Connect one leg of the Push Button to GPIO 9.
- Connect the other leg of the Push Button to GND.
- Connect the COM (Common) Screw terminal on the relay to 3.3V.
- Connect the NO (Normally Open) Screw terminal on the relay to longer leg (anode) of the LED.
- Connect the shorter leg (cathode) of the LED to one end of 220Ω resistor.
- Connect the other end of the resistor to GND.
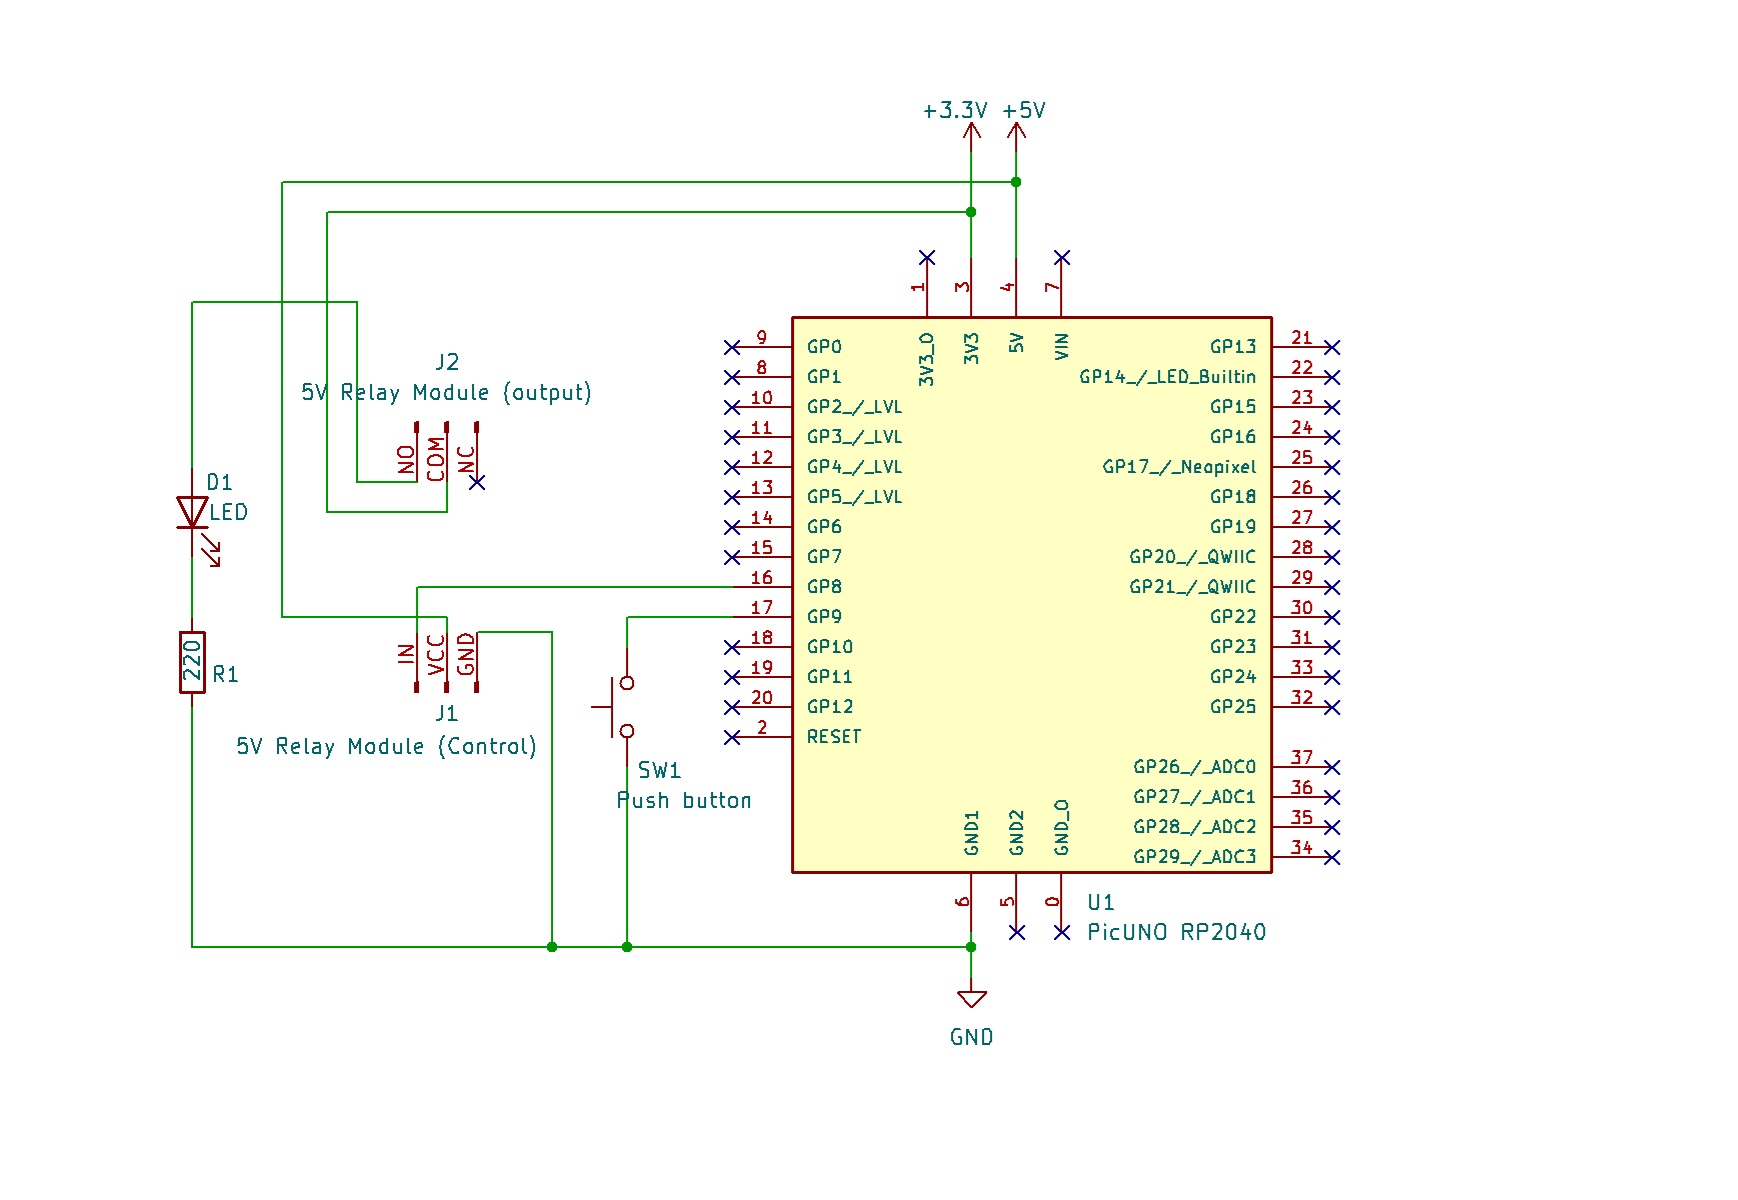
SCHEMATIC:
Relay VCC → 5V
Relay GND → GND
Relay IN → GPIO 8
One leg of Push Button → GPIO 9
Other leg of Push Button → GND
Relay COM → 3.3V
Relay NO → anode of LED
Cathode of LED → 220Ω resistor → GND
CODE -- C:
const int BUTTON_PIN = 9;
const int RELAY_PIN = 8;
bool relayState = LOW;
bool lastButtonState = HIGH;
void setup() {
pinMode(RELAY_PIN, OUTPUT);
pinMode(BUTTON_PIN, INPUT_PULLUP); // Use internal pull-up resistor
digitalWrite(RELAY_PIN, relayState); // Start with relay off
}
void loop() {
bool currentButtonState = digitalRead(BUTTON_PIN);
// Check for a button press (a HIGH to LOW transition)
if (currentButtonState == LOW && lastButtonState == HIGH) {
relayState = !relayState;
digitalWrite(RELAY_PIN, relayState);
delay(50); // Simple debounce delay
}
lastButtonState = currentButtonState;
}
pinMode(BUTTON_PIN, INPUT_PULLUP); - Configures the button pin and activates an internal resistor to keep the signal stable, removing the need for an external resistor.
if (currentButtonState == LOW && lastButtonState == HIGH) - This is edge-detection logic. It ensures the code only runs once per button press, not continuously while the button is held down.
relayState = !relayState; - This line flips the state of the relayState variable from true to false (or vice-versa) each time the button is pressed.
digitalWrite(RELAY_PIN, relayState); - This sends the final command (HIGH or LOW) to the relay module's signal pin to turn it on or off.
CODE -- PYTHON:
from machine import Pin
import time
button = Pin(9, Pin.IN, Pin.PULL_UP)
relay = Pin(8, Pin.OUT)
relay_state = 0
last_button_state = 1
relay.value(relay_state) # Start with relay off
while True:
current_button_state = button.value()
# Check for a button press (from not pressed to pressed)
if current_button_state == 0 and last_button_state == 1:
relay_state = 1 - relay_state
relay.value(relay_state)
time.sleep_ms(200) # Debounce delay
last_button_state = current_button_state
time.sleep_ms(10)
button = Pin(9, Pin.IN, Pin.PULL_UP) - Configures the button pin as an input and enables the internal pull-up resistor.
if current_button_state == 0 and last_button_state == 1: - This is edge-detection logic that runs only on the moment the button is pressed.
relay_state = 1 - relay_state - This is a simple trick to toggle a variable between 0 and 1. If relay_state is 0, 1-0 is 1. If it's 1, 1-1 is 0.
relay.value(relay_state) - This sends the final ON (1) or OFF (0) signal to the relay's signal pin.